This scenario consists in a waiting room, where the patient is initially placed, and an extraction room, where the healthcare professional can later lead the patient to. In both spaces, the patient can hear different commentaries from other patients related to the needles and then, in the extraction room, he can observe a table with the instrument that will be used (syringes, needles, cotton, etc).
SETTINGS VARIABLES
Gender Choose between a male or female body. A neutral body is selected by default.
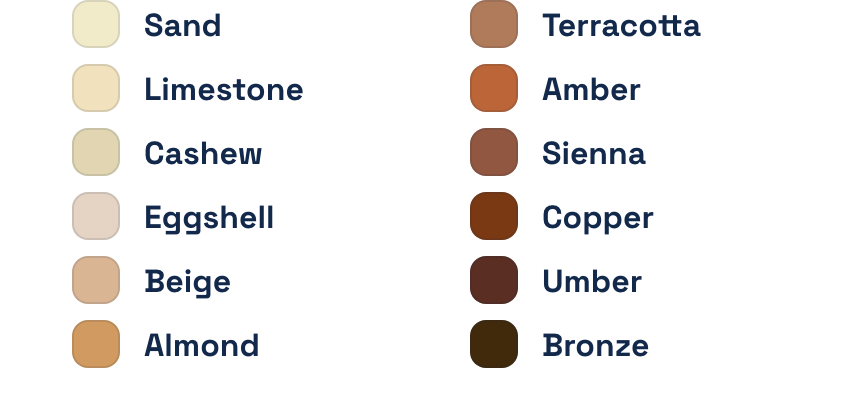
Skin tone Choose the skin tone that best represents your patient to enhance the feeling of immersion.
Select rol Patient / Escort
Sanitary mask You can choose whether or not the people around you will have a mask.
EVENTS
Another patient enters As long as the patient is in the waiting room, the nurse comes out from the extraction room to call in another patient and they get in the extraction room. After a few minutes the patient comes out.
Enter extraction room The nurse will call in the patient and they will get in the extraction room.
Finger prick The nurse will extract blood from the patient’s finger.
Injection If the healthcare professional chooses this option, the patient will get an injection in his arm.
Small extraction The patient will get a little blood extraction.
Hard extraction A considerable amount of blood will be extracted from the patient’s arm.
This environment takes the patient to the airplane, which is typically the environment that produces the most anxiety in this disorder.
SETTINGS VARIABLES
Show passengers No person / Maximum number of people
Comments When this option is activated, comments from someone in a situation of high intensity anxiety are reproduced.
Row
Front (in front of the wing)
Middle (above it),
Back (behind the wing)
Seat position Window / Middle / Aisle
Time Day / Night
Weather Sunny / Rainy / Storm
EVENTS
Taxi The hostesses give the safety instructions while the plane travels until it reaches the takeoff point.
Takeoff The engines are heard , the plane accelerates and takes off.
Flying The patient is in full flight.
Landing The captain warns of the arrival at the destination and proceeds to the landing.
Ding Reproduces the typical sound of airplanes when they want to indicate an incident.
Turbulence amount Available when the patient is within the flight event.
In order to adapt the session to the patient’s needs , you can skip steps along the path and / or repeat any of these steps as many times as you see fit.
The patient is sitting inside the taxi and heading towards the airport terminal.
SETTINGS VARIABLES
Time Day / Night
Weather Clear/ Rainy
EVENTS
Radio News about the weather will be heard. During flight. The news varies according to the chosen climate.
Go to final The taxi ride does not have a specific duration, it is the healthcare professional who decides when to arrive. This allows the exposure to be adapted to the needs and pace that the patient needs.
This is a scenario aimed at the treatment of anticipatory anxiety, which is an essential component of flight phobia. In this scene, the patient is at home and is about to leave on a trip and must wait for the taxi that will take him to the airport.
SETTINGS VARIABLES
Time Day / Night
Weather Clear/ Rainy
EVENTS
TV weather report News about the weather forecast are shown on TV. The news vary according to the weather conditions previously selected.
TV crash report News about a plane accident are shown on TV.
Taxi arrives Upon enabling this setting, the taxi driver arrives to pick up the patient and make their way to the airport.
Thunders Activates the sound of thunder outside the house.
The highway virtual environment displays a three-lane road with straight sections and curves. In this environment, the healthcare professional can manipulate specific variables in order to design a personalized exposure hierarchy for each patient.
SETTINGS VARIABLES
Cars in road None / Full
Passengers None / Full
Patient position Driver / Passenger
Time Day / Night
Weather Clear/ Rainy
EVENTS
Turn left
Turn right
Accelerate To regulate the speed of the car. The speedometer will respond according to the selected speed changes. If the vehicle is travelling at the maximum speed (5/5) on the left lane and returns to the center lane, the speed will be reduced to 4 to avoid colliding with the vehicle ahead.
Distraction
Telephone: the driver receives a call.
Passenger: a passenger distracts the driver with his mobile.
Radio: the co-pilot plays loud music.
Type Road: Tunnel / Bridge / Highway (Please note that these are infinite stages, so the selected stage will go on until another option is selected.)
Curve Straight / Mixed / Curves
Accident Displays a broken car on the right side of the road.
Broken engine Causes the car to slow down and an error signal appears on the car’s controls.
This route reproduces a car journey through a city. Includes clinically relevant elements such as straight streets, corners, traffic signs, stop lights and cars moving through the streets.
SETTINGS VARIABLES
Number of cars Regulates if the car ride takes place with or without cars on the road. Choose among three traffic flow options: none, minimum, medium and maximum.
Number of passengers:
Minimum (only the driver)
Medium (driver and front passenger)
Maximum (with passengers in the back seat)
Seat It changes the avatar position (driver/passenger).
Time Day / Night
Weather Clear/ Rainy
EVENTS
Speed The speed can be increased and decreased with a slider control.
Circuit Choose between two different routes: Track 1 (less anxiogenic. With straight roads and few curves and intersections) and Track 2 (fewer straight distances, constantly turning corners, cars coming from both ways).
Horn Reproduces the sound of a horn.
Hard brake The driver suddenly hits the brakes.
Ambulance An ambulance with its siren turned on can be heard. The car stops at a traffic light and the ambulance crosses in front.
Enable traffic jam The driver is stuck in traffic.
The nocturnal environment, which takes us around the house is made up of 5 rooms graded a priori at various levels of darkness from greater to less lighting: training room (TV room, always lit), Living room, HallBathroom, Hall-Attic and Bedroom (at the start, half-lit). The child/adult can move around the various stimulating environments at a progressive level associated with their discomfort.
ZONE 1 Training Zone
DESCRIPTION
The patient will start off in the living room in the house, close to the TV room. From this area the patient can see the living room and two doors which look onto the hall, the closest room being the living room, right beside the bedroom, leads onto the hall-bathroom as well as the hall-attic at a progressive level. The patient will pass through these three areas (by means of the teleportation event) and the bedroom (which is not visible in the training area). In addition.
FEATURES
The level of lighting in this space will always be good and will not be affected by the activation of events.
When we are located in this area (working with children) and the active co-therapist environment has been defined, you can activate the introduction event.
There is a big picture window which will let the patient know it is night-time and allow us to work on the climate settings and the intensity of the rain event.
ZONE 2 Living room
DESCRIPTION
The work begins in the living room space, the space nearest to the training zone. By means of low levels of discomfort, including both fear of darkness and storms, the visible features here, just by changing your viewpoint, will be the very same as the ones explained in the training zone.
FEATURES
The lighting here in this space is of lower intensity than in the training zone.
This zone can be altered with the activation of the ambient Light event, in other words, the light intensity can be modified (ambient Light event).
A window, indicating it is night-time allows us to work on the climate settings and the rain intensity event.
When the co-therapist setting is activated the patient can gain up to 200 tokens for being in this area, (see environment level).
ZONE 3 Hall-Bathroom
DESCRIPTION
This space is located at the beginning of the hall. The patient will see a window behind them, the living room is on the left (separated by a door) and the bathroom on the right (not visible, but half visible). The Bedroom will be visible at the back. You can start to work on middle levels of discomfort in this area.
FEATURES
Lighting is of lower intensity than that of the living room and the training zone.
This zone can be altered with the activation of the ambient Light event, in other words, the light intensity can be modified (ambient Light event).
A window, indicating it is night-time allows us to work on the climate settings and the rain intensity event.
When the co-therapist setting is activated the patient can gain tokens for exploring this area, (visiting this space). As it is darker than the Living Room area, 300 tokens will be allocated.
ZONE 4 Hall-Attic
DESCRIPTION
Situated at the end of the hall, near the Bedroom door. The patient will be able to see a window at the end of the hall, the attic stairs (not accessible), and a training area, through the door, on the right. Here, middle levels of discomfort can be worked on further in this space.
FEATURES
Lighting is of lower intensity than that of the training zone, living room and bathroom.
This zone can be altered with the activation of the ambient Light event, in other words, the light intensity can be modified (ambient Light event).
A window which is far away, will indicate it is night-time allowing us to work on the climate settings and the rain intensity event.
When the co-therapist setting is activated the patient can gain tokens for exploring this area, (visiting this space). As it is darker than the HallBathroom area, 500 tokens will be allocated.
ZONE 5 Bedroom
DESCRIPTION
The patient will now be located in a bedroom, where there is a big window, a bed, table with a computer, a wardrobe, a token economy chart table hanging on the wall (a type of token economy chart) and a door that leads to the hall. The patient will be able to see the window at the end of the hall. Here the patient will be working on high levels of discomfort.
FEATURES
By defect, the light in this zone is of the lowest intensity compared to the other spaces.
This zone can be altered with the activation of the ambient Light event, in other words, the light intensity can be modified (ambient Light event).
A big window, indicating it is night-time allows us to work on the climate settings and the rain intensity event.
When the co-therapist setting is activated the patient will gain tokens for exploring this area, (visiting this space). As it is darker than the Hall area, 700 tokens will be allocated.
The Lying down event can be activated here, which provides a lying down simulation on a bed and here the highest tokens can be obtained (up to 1000).
SETTINGS CONFIGURATION
Firstly, the environment configuration settings will permit activating or deactivating features depending on whether you carry out the intervention with a child or an adult (with or without co-therapist “Psicobot”), secondly, control the level of difficulty desired (with children: easy achievement, middle to higher tokens) and, lastly, adjust the climate (when working on fear of storms: clear spells, rain and storm).
CO-THERAPIST (A)
Each environment detects when a co-therapist is present throughout the intervention. When the active co-therapist environment is activated, Psicobot will be at hand, a virtual assistant designed for the intervention with children with fear of darkness and /or storms. Whilst the co-therapist is activated all the environment events will be accessible (introduction, teleportation, help…). The following Psicobot functions are available:
Explain to the child how to interact with the virtual reality environment, through modelling. Explain how to teleport, how the virtual headpiece works, how the tokens system works and how to ask for help out loud.
Provide assistance (help event) when the child requires it and when asked for out loud.
When in Deactivated Co-therapist the environment will change into an intervention tool for adolescents and adults who fear darkness and storms. When you select this option the environment gamification effects will disappear, that is to say, the environment configuration Points will stop working (even when you change the parameters it will not be depicted in the environment) and the Introduction and Help events will be blocked.
POINTS (B)
The Points configuration setting will only have an effect on the environment when the Co-therapist environment settings is in activated mode. Otherwise, it will have no effect on the virtual environment.
The objective of the environment is to encourage the exploration of the zones and individual spaces in the house in the form of games. When the healthcare professional feels it would be of advantage, use the token economy. A victory token counter will be made available to the child in the virtual headpiece and an explanation will be given to the child by Psicobot during the introduction event.
Its function is to allow for the child to obtain tokens for spending time in these areas and for exploring the individual spaces in the environment (Living room, hall-bathroom, hall-attic, Bedroom and Bedroom-lying down). The following is a summary of the Time Relation (seconds)/tokens for spending time in each of the spaces according to the level of difficulty selected.
Time /tokens
Living room
Hall – bathroom
Hall – attic
Bedroom
Lie Down
easy
10/200
10/300
10/500
10/700
10/1000
medium
60/200
60/300
60/500
60/700
60/1000
difficult
120/200
120/300
120/500 1
120/700
120/1000
Other relevant rules related to obtaining tokens:
Once the maximum amount of tokens have been obtained, and the patient keeps changing spaces, the tokens obtained will be added to the accumulated tokens in the individual zones.
Repeating a space in the same session: for example, they go from the training zone to the living room and from the training zone back to the living room:
If the maximum amount of tokens has already been obtained on a previous occasion, 25% additional time needs to be allocated to obtain the score the next two times they enter the space. For example, when they are in the easy setting and situated in the living room, they will need 10 seconds to get 200 tokens, the second time they visit they will need 12.5 seconds to gain 200 more tokens and the third time, 15 seconds to gain another 200 tokens).
To avoid the patient getting stuck in the space and, still be able to gain tokens: the patient will no longer gain tokens from the third attempt onwards.
If the patient abandons the space before the time is up to obtain the total amount of tokens, they will lose tokens. This will not affect the time they need to spend in the space to obtain the tokens.
The tokens system will reset when the activated session finishes (Finish button or Next scene). In other words, if you want to control the tokens obtained between the sessions or exercises: take note of the tokens already obtained by the minor, e.g, in the table provided in the appendix.
CLIMATE (C)
Clear Spells: there will be no rain and it will be night-time.
Rain: light rainfall with no lightning or thunder will begin.
Storms: rain will become more intense and thunder and lightning will be present.
The climate Rain and Storm setting modes can be adjusted with the Severity of the rain event.
EVENTS
Events will be activated or blocked in function with the Co-therapist configuration setting mode (Activated/Deactivated). To find out how they affect the event availability, check the environment settings in the previous section, We shall now proceed onto outlining the features of each of the individual events.
INTRODUCTION (A)
The introduction event will only be disengaged when the Co-therapist configuration setting is in Activated mode and the patient is situated in the Training zone. If the user is placed in another space (Living room, HallBathroom, Hall-Attic or Bedroom) the event will be blocked.
This event is specifically designed for working with children and serves as a way of relating oneself with the environments via modelling. Once activated the Co-therapist Psicobot will appear in the training Zone and will explain how to use its new teleportation “superpower”, how to gain tokens, how he can be of help… Psicobot will give the patient a virtual headset: a superimposed interface in VR, which the patient will be able to see. The virtual headset will indicate to the child:
The level of difficulty in the top right-hand corner
Tokens in the bottom right-hand corner
Help in the top left-hand corner
In the bottom left-hand corner, the name of the space in the house at which they are looking at (Living room, Hall-Bathroom…) and where they can be teleported to.
Remember that all the gamification of the environment, the introduction, Psychobot, the virtual helmet, the points … will only appear in the VRwith the Co-therapist-Activated configuration variable.
TELEPORTATION (B)
A drop-down menu is available in Teleportation where you will be able to select the area of the house you wish to teleport the patient to, and thus, be able to move around the separate rooms.
Training zone
Living room
Hall-bathroom (Bathroom in the patient’s headset)
Hall-attic (Hall in the patient’s headset)
Bedroom
This event will always be activated, regardless of the modes selected in the environment settings. Nevertheless, the way it works will be different in function to whether the Co-therapeutic configuration setting is Activated or Deactivated.
The Co-therapist Activated mode is designed to work with children. Once activated a sound and visual effect which simulates a type of teleportation Thor in the Marvel movie (bridging the gaps and naturally adapting it to children!) will appear. The work begins in the living room space, the space nearest to the training zone.
Before starting the VR we recommend you practice a sweeping gesture with the child, using the body and arms to help avoid displacements (movement with the virtual reality glasses on could provoke knocks and falls). For instance, lifting up the right arm with the fist closed, whilst looking at the floor. The teleportation visual effect is far more appealing when looking down! Just as Psicobot will indicate in the introduction event and, especially if you are using the performance scenes as an intervention technique, when you wish to use the teleportation, we recommend the child says “Teleportation to“ out loud adding “lively” movements, which you will have already practiced. Activate the teleportation event at that moment and …watch what happens!
In Co-therapist Activated mode, the transition between spaces is executed using a black background. Less “impressive” but just as effective! Remember this configuration mode is aimed at working with adults and/or when you use the gradual exposure technique.
HELP (C)
This event will only be disengaged when Cotherapist-Activated mode has been selected. This is a drop-down menu that provides stimulating phrases, coping/social reinforcement… that can be used when the child asks for help from Psicobot, as previously explained in the introduction event. For instance: if the child is in the Hall-Bathroom zone and says “Psicobot help” out loud, select “There is nothing wrong with feeling afraid” sentence…” and Psicobot will then appear in the child’s headset and give the child instructions. Once again you could encourage the child to make a lively and marked gesture (for example, right arm pointing up to the top left part, where Psicobot will appear) and will respond to the child’s request:
You can teleport whenever you wish, you only have to say the word “teleport and make a really super strong gesture with you arms”
“Hello, I am here. You are doing really well. Keep goingí”
“Try to stay a bit longer, just wait and see, little by little you will start to feel better”
“You are doing really well! Look how many tokens you have got!”
. “¡You have progressed so much!”
“Don’t worry. Keep on exploring, he who perseveres, succeeds!”
“As my friend Captain America always says: there is nothing wrong with feeling afraid when you don’t give up”
“Very good! Excellent! You have achieved all the tokens in the area!”
LYING DOWN / GET UP (D)
The Lying down on the bed event will only be available when we are situated in the Bedroom. The other spaces (Living room, HallBathroom…) will be disengaged. Here you could change the patient’s viewpoint from standing up inside the bedroom to lying down in the bed. Once lying down on the bed, and you want the patient to get up but still stay in the bedroom, press the recharge button that is beside the event, ”Lie down on the bed”, whilst selecting Bedroom.
AMBIENT LIGHT (F)
This ambient light event will always be activated. You will always be able to adjust the lighting level, whenever you wish, when the patient is present in this space, with this slider. Remember each space has a preset level of darkness and is graded from higher to lower in each space (Training zone, Hall-Bathroom, Hall-Attic and Bedroom). Also remember that the training zone will always have the same level of light, in other words, it won’t be affected by the activation of the ambient light event.
RAIN INTENSITY (G)
You will always be able to adjust the rain level, which you will hear or see through the windows wherever the patient may be situated to your liking in this slider. Remember this event will not be activated if you have set Climate in Clear Spells, i.e if you want to use it, you must have previously set the climate in Rain or Storm mode.
The Amelia Virtual Care platform features a virtual reality (VR) environment for spider exposure. In this environment, the patient is seated and can see a terrarium on the table in front of him.
VARIABLES SETTINGS
The configuration variables will allow modifying the environment to suit each patient and each phase, be it the evaluation or the treatment phase. For this, you will have the same configuration variables available, explained below:
Gender Choose between a male or female body. A neutral body is selected by default.
Skin tone Choose the skin tone that best represents your patient to enhance the feeling of immersion.
Spider size The system allows for selecting among small, medium or big insects.
Amount of spiders The number of insects the patient will have to deal with can be determined. One may select between one spider (minimum), or many spiders(maximum).
Zone of exposition The system allows to have the spider on the table or in a terrarium.
EVENTS
Far distance Spiders will be situated in a far distance from the avatar.
Medium distance Spiders will be situated in a medium distance from the avatar.
Near distance Spiders will be situated in a near distance from the avatar.
Move finger The avatar starts to move a finger. This option aims to enhance the immersion of the patient through a rhythmic movement that will have to be done at the same time, facilitating this way to identify the hand you are seeing as your own.
Spider on hand The spiders will get close and walk on the avatar hand.
Play noise A noise can be heard and the spider will begin to move from side to side.
This virtual reality (VR) environment aims to create an ideal environment to apply the exposure technique to cockroaches. In this environment, the patient is seated and can observe a terrarium on the table in front of him.
SETTINGS VARIABLES
Number of cockroaches Allows regulating the amount of cockroaches from a minimum to a maximum (6 cockroaches).
Zone of exposition You can choose if cockroaches are on the table or inside the terrarium.
Cockroach size Choose between three sizes: small, medium and large.
EVENTS
Cockroach noise A noise is heard and the cockroach will start moving from side to side.
Near distance Position the cockroaches at a close distance from the patient.
Medium distance Position the cockroaches at an average distance from the patient.
Far distance Position the cockroaches at a far distance from the patient.
Cockroach in hand When this event is activated, cockroaches will approach and begin to walk above the avatar’s hand.
Move finger The avatar starts to move a finger. This option aims to enhance the immersion of the patient through a rhythmic movement that you will have to perform at the same time, thus facilitating the identification of the hand you are seeing as your own.